How to Find the Best Wi-Fi Channel Your Route on any OS.
4 min read
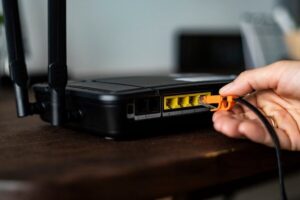
Almost everyone has a wireless network connection at home these days. Wireless access to your router is connected to a specific channel that connects you to a Wi-Fi network. If you live in a complex apartment, you have no doubt noticed more than just the network IDs of aggressive neighbors – most likely, your wireless connection has gone off or not as fast as you would like. This often happens because of the Wi-Fi channels available in your area. If you want more tips and tricks related to your networking devices and Wi-Fi Routers, visit our website at Router Login. We have the best guides and how-to tutorials for all your networking needs. These problems are usually caused by the high number of users trying to connect to the Internet simultaneously, resulting in the wireless signal loading the same network channel. To get the best Wi-Fi connection in your area, switch to a channel that has no other users (or very few users) than you currently have.
Wireless access to your router is connected to a specific channel that connects you to a Wi-Fi network. If you have ever had a problem with Wi-Fi from time to time, you know that simple remedies like moving close to your router or restarting it do not always work. Adjusting your router settings can help, and the Wi-Fi channel is an important router setting that determines your Wi-Fi network capabilities.
What is a Wi-Fi channel?
A Wi-Fi channel is a broadband, a frequency wave used by your router to transmit wireless signals. Your router can use one of the most common Wi-Fi bands (2.4 GHz or 5 GHz, or both if it is a double band), but there are exceptions: sometimes it is better to use one of these Wi-Fi bands over another, and one channel for Wi-Fi more than others. This is why:
When it comes to Wi-Fi availability and speed, there are choices to be made, and the Wi-Fi coverage and the rate offered by the 2.4 GHz and 5 GHz Wi-Fi band bands are the two most important boundaries between them. Because the 2.4 GHz Wi-Fi emits high-frequency signals, it can easily penetrate the walls of your home with solid objects, increasing Wi-Fi coverage continuously. The top 5 GHz Wi-Fi band allows for faster download and download speeds, resulting in improved performance.
Wi-Fi interruptions are more common on some Wi-Fi stations.
Wi-Fi channels, as we have said, are small bands within each Wi-Fi frequency band. In the 2.4 GHz Wi-Fi band, there are 11 Wi-Fi stations and 45 in the 5 GHz spectrum. However, it is important to know that because some of these intermittent channels produce more Wi-Fi interference than others.
Here are step-by-step instructions that will show you how to extend your Wi-Fi connection by identifying the appropriate Wi-Fi channel for your router on any OS.
-
Select the Wi-Fi frequency band that works for you.
While you may be tempted to choose 2.4 GHz Wi-Fi because it offers better Wi-Fi installation, consider the location you want to install first. If you have more levels and rooms to reach, the 2.4 GHz is probably the best option. However, if you have an open ground system with few features and obstacles along the way, 5 GHz will probably give you a better Wi-Fi experience. Frequency bands simultaneously. If your router is one of them, it’s best to split your devices between two Wi-Fi groups for best performance.
-
Explore access points in your area.
If you are not a Minim user, you may need to use the Wi-Fi network analysis tool (provided by Minim out of the box). It is a simple check to see how other local routers are behaving, especially which Wi-Fi band and channels they use. This information will help you figure out how to set up your Wi-Fi channel settings with minimal interruption. This information can be accessed using a high-end Wi-Fi network analysis system.
-
Choose a non-crowded Wi-Fi channel.
You can now select a fixed Wi-Fi channel for your route based on steps 1 and 2. This could be channels 1, 6, or 11 on a 2.4 GHz band. This could be one of the 24 fixed stations in the 5 GHz range. Select one of these channels depending on the range of Wi-Fi frequency you have selected and the data you collect about your nearby access points.
macOS
-
A free Wi-Fi diagnostic suite is installed with macOS
Hold down the select key while clicking on the Wi-Fi icon in the menu bar to access it. In the drop-down menu that led to it, you should see Open Wireless Diagnostics. That’s an option. A dialog box will appear, but no need to click Next. Select Windows> Scan from the menu bar at the top of the screen. In the lower right corner, select Scan Now. If not mentioned, you should see a list of available networks soon. You can see more details, such as the current channel and channel width, by scrolling to the right of the network list. There are also suggestions labeled Best 2.4GHz and Best 5GHz on the left side and a recommended channel number.
-
Windows
Wi-Fi Analyzer is a free program available in the Windows Store for Windows 10 users. If you do not have access to a computer, type the Wi-Fi analyzer in the Cortana search box, and it should show up. To find the file, go to the store page. You will need to give the app access to use Bluetooth and your Wi-Fi adapter and notify your location when you start using it. After completing that, go to the Analyze tab to view the beautiful graph. You should be able to see the channel with the least amount of traffic.
-
Android
For Android, there is a free app called Wi-Fi Analyzer with the same name. It has a lovely graph, and using your phone gives you the advantage of moving around. This can help you find dead Wi-Fi hotspots in your home. With its Channel Rating rating
![VidMate APK & VidMate APP Download Free for Android [2024]](https://www.englishsakshi.com/wp-content/uploads/2024/02/VidMate-APK-VidMate-APP-Download-Free-for-Android-2024-300x190.png)